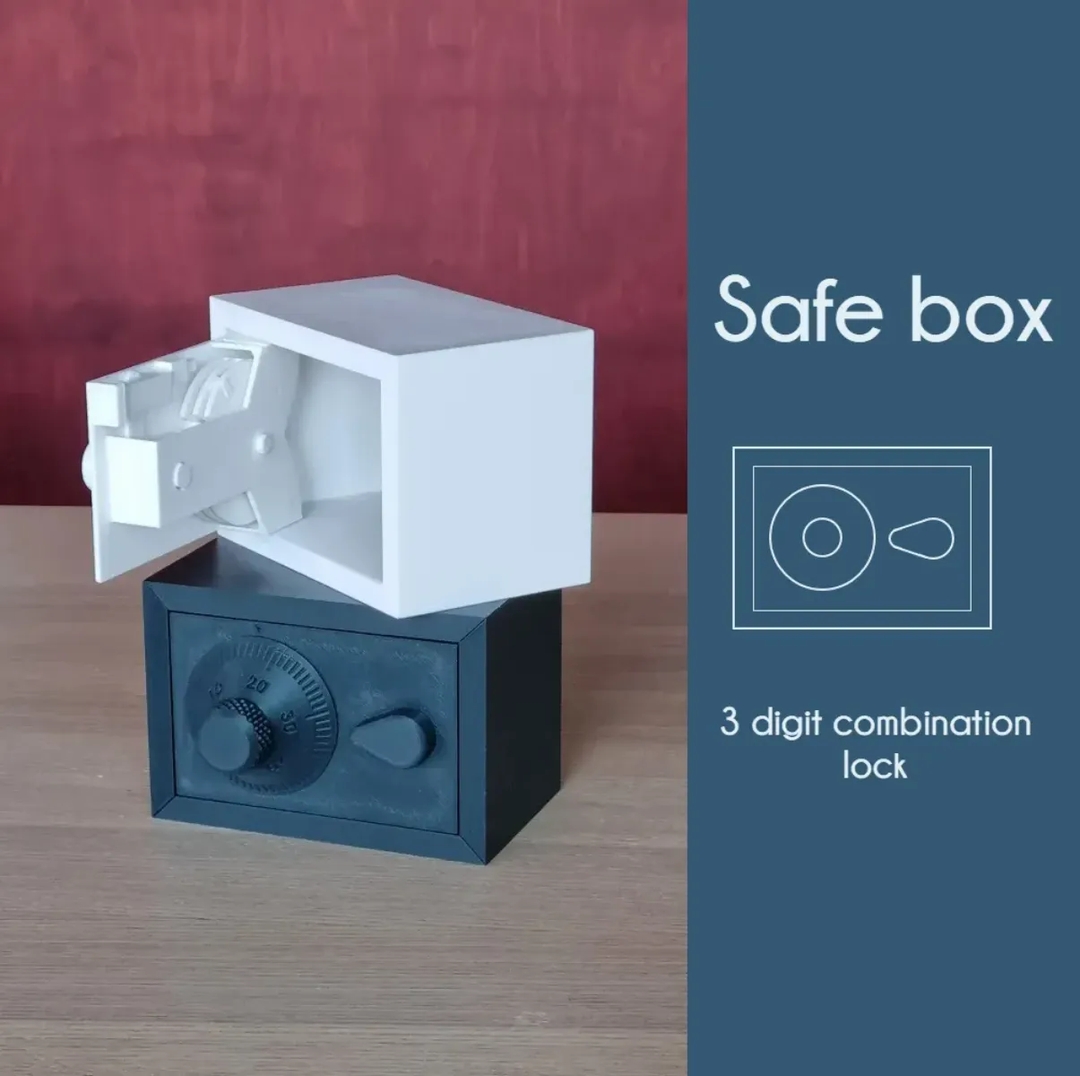
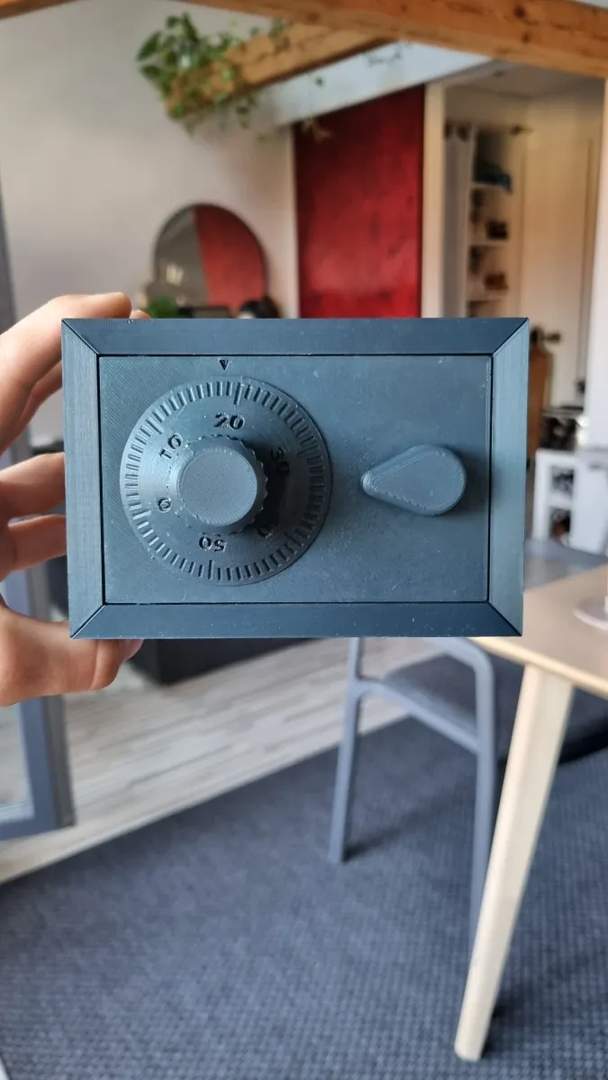

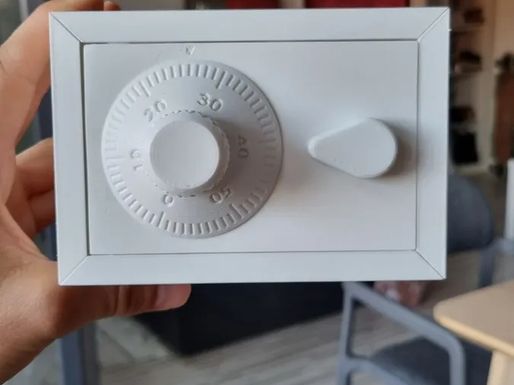
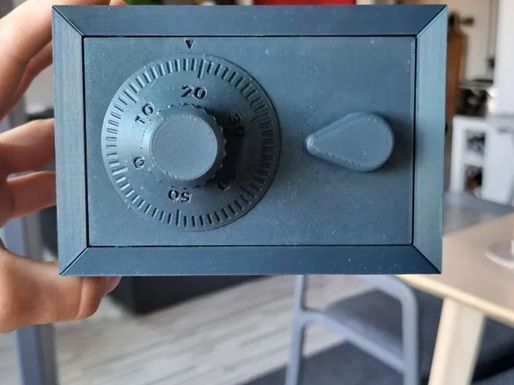
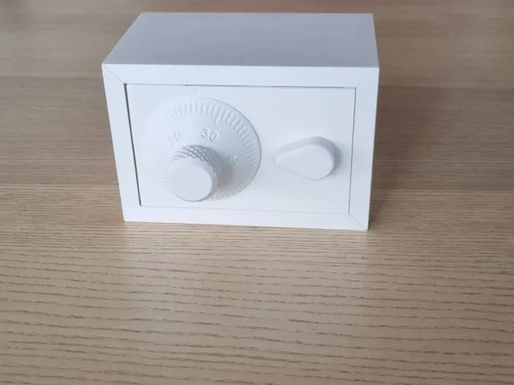
Safe box - 3 digit combination
1083
8

Product description
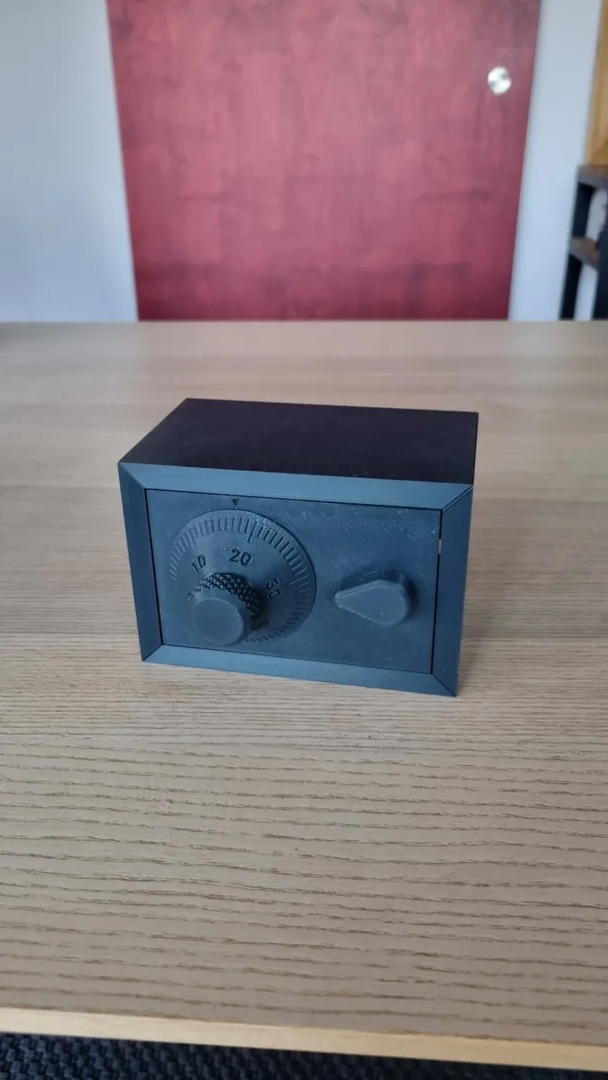
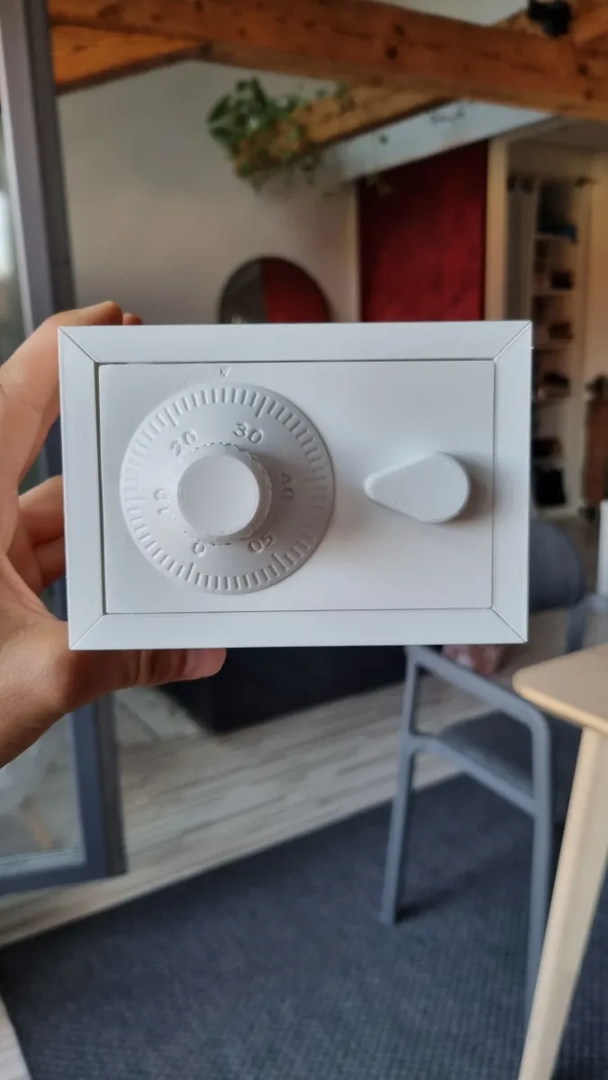
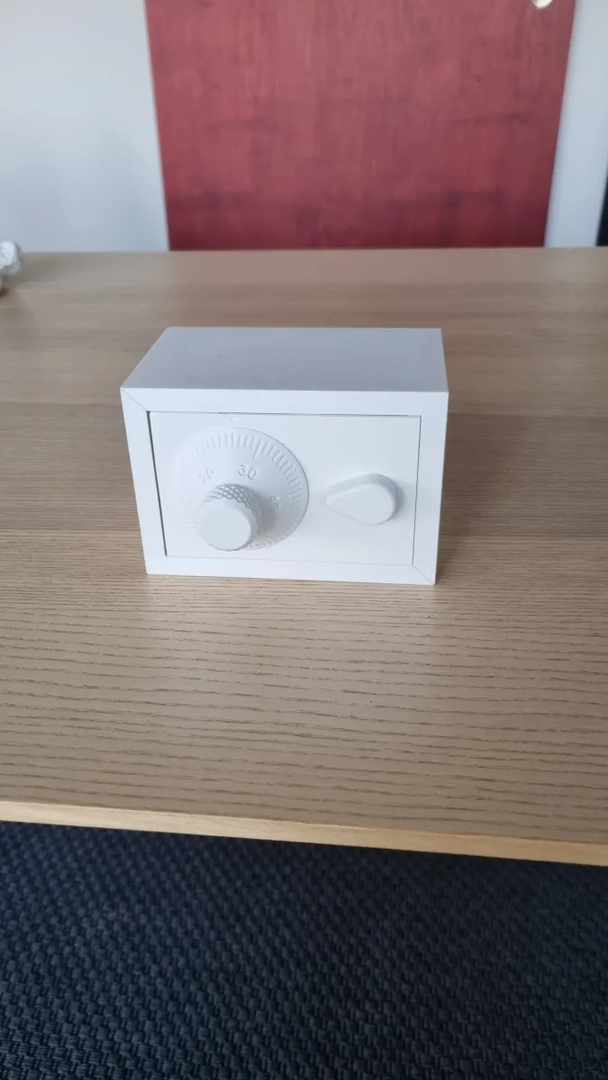
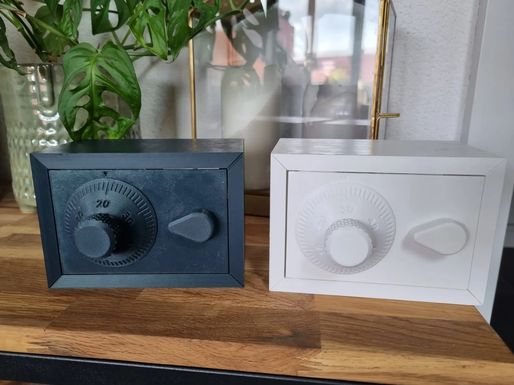
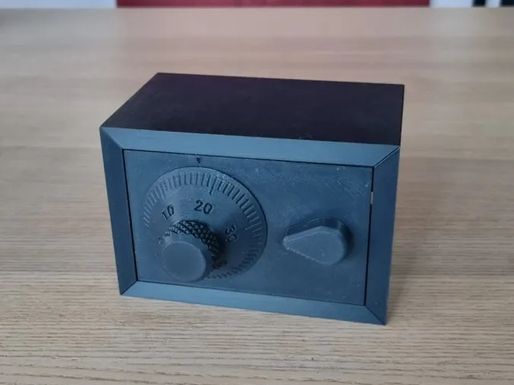
This is a working 3 digit combination safe box to keep your important stuff protected.
If you need to secure your precious belongings in a safe place, you found what you were looking for. This safe is secured by a 3 digit combination to prevent anyone from opening it (unless they have a hammer or a heat gun, I mean it's just plastic at the end)
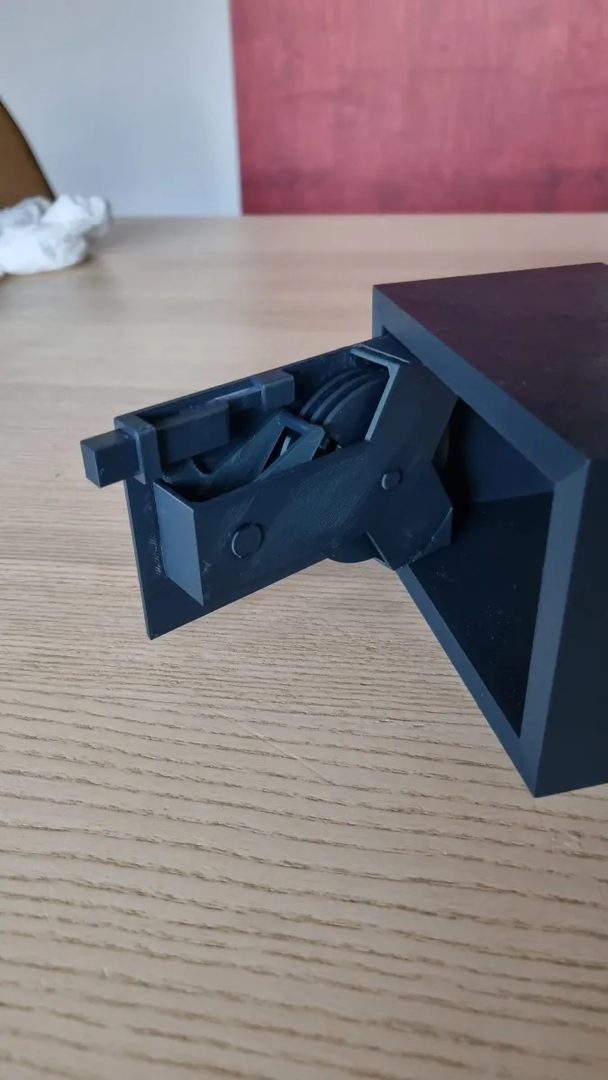
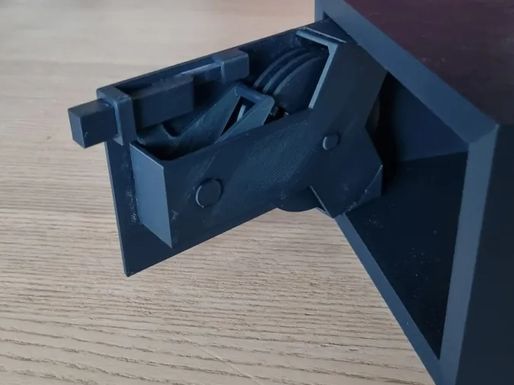
This is kind of a long build but it is perfect to learn how a combination safe works.
Printing settings
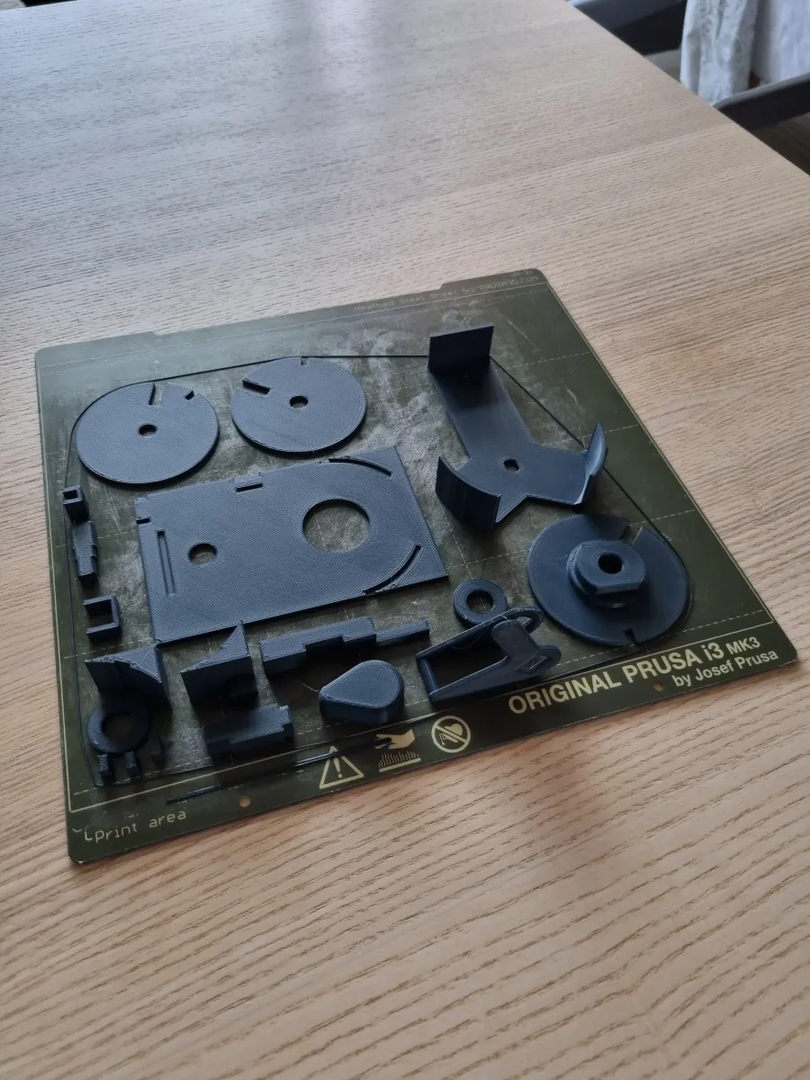
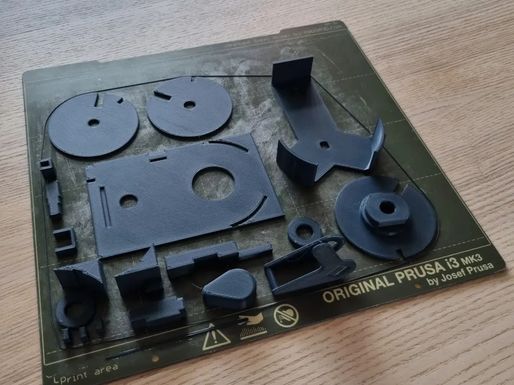
Start by printing all the parts I provide, I used PLA with 0.2mm layer height and 20% infill for everything and non support.
For some part the printing orientation is quite important for the strength, so this is the orientation for the parts you may have a doubt with :
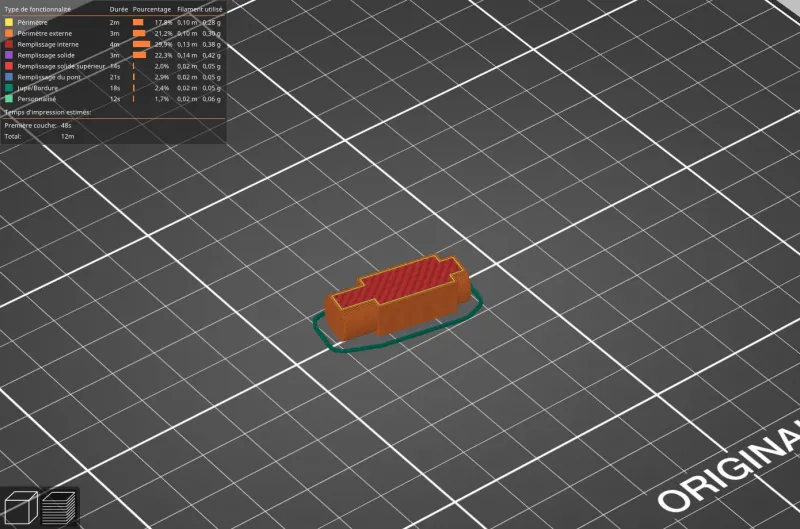
Both axle are printed on the side for better strength :
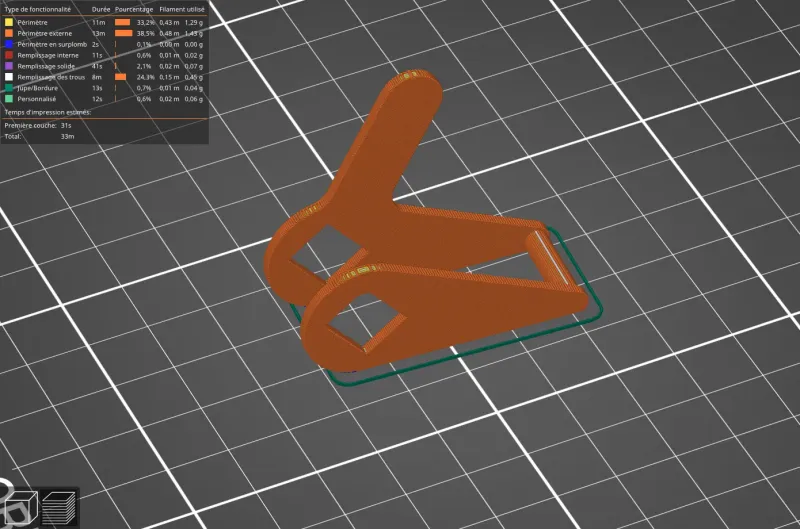
The lever is printed like this :
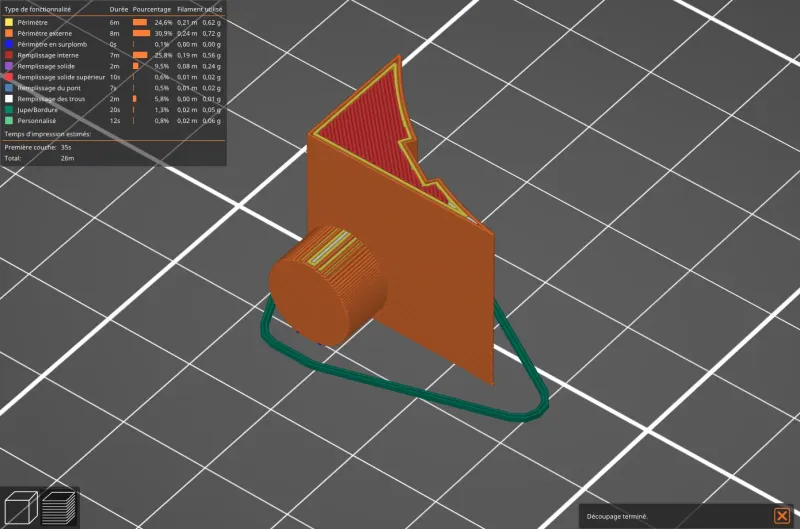
Both pivots are printed on the side :
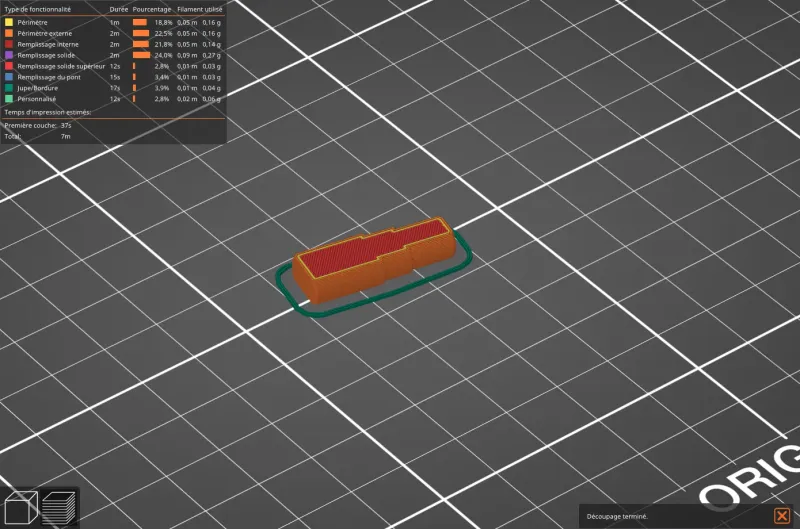
The pins are printed like this :
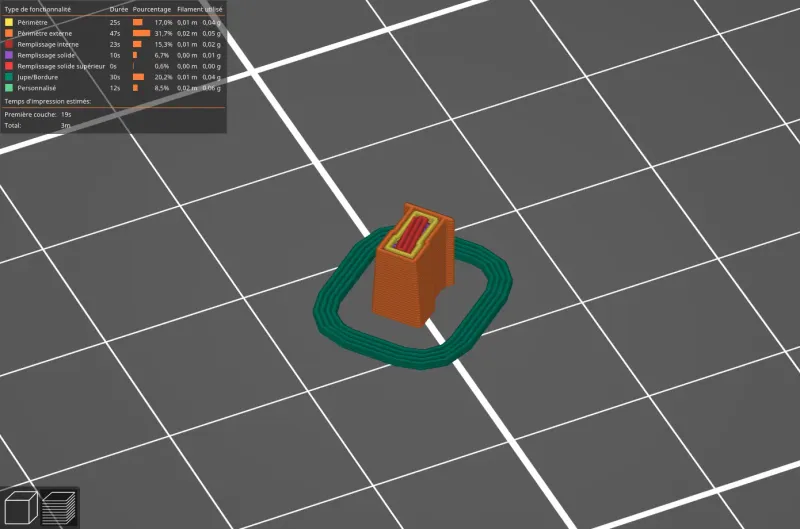
The latch is printed like this :
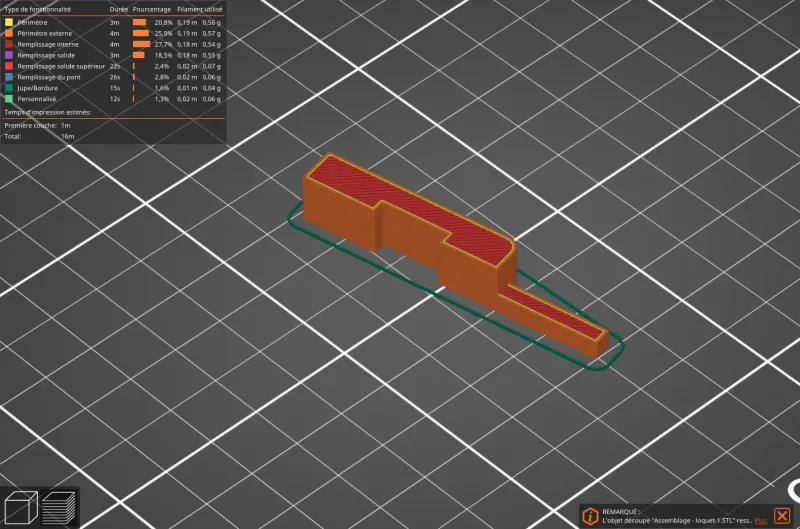
All the oher parts orientations should be pretty obvious.
Building instructions :
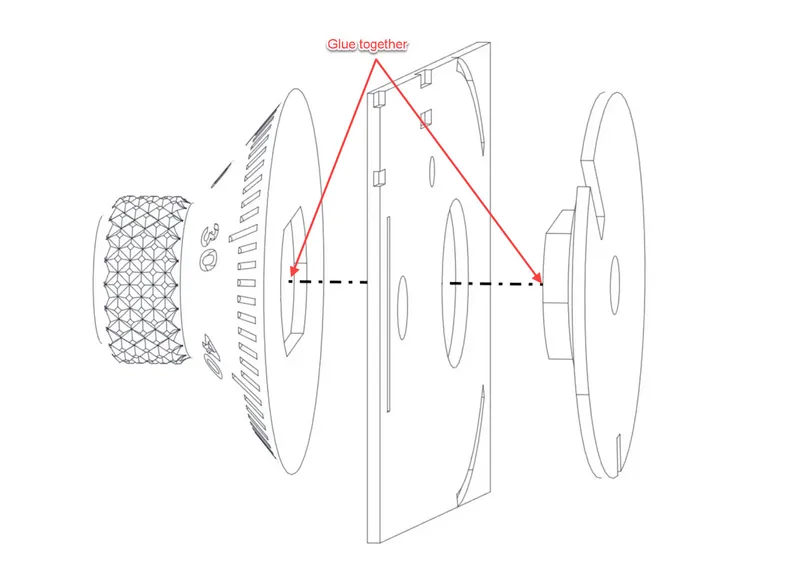
- Glue the dial with the disk_1 through the front_plate :
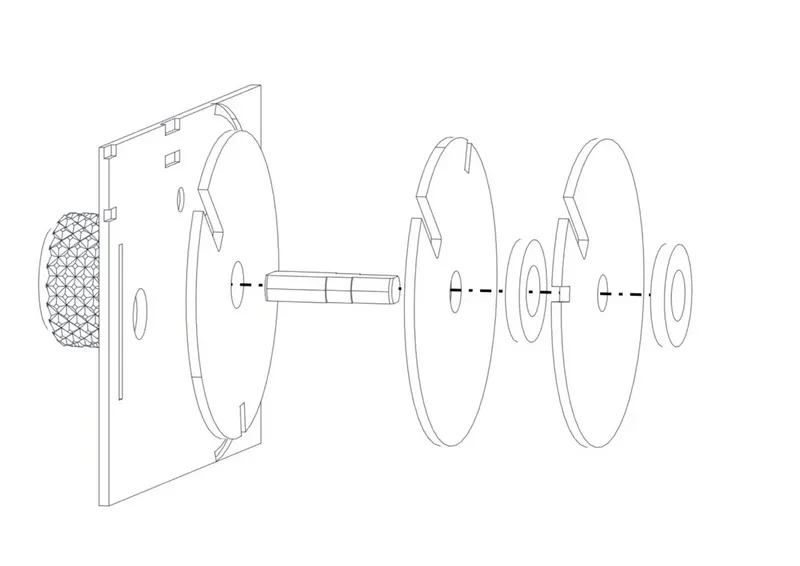
- Add the axle_1, the 2 remaining disks and the spacers, no glue required :
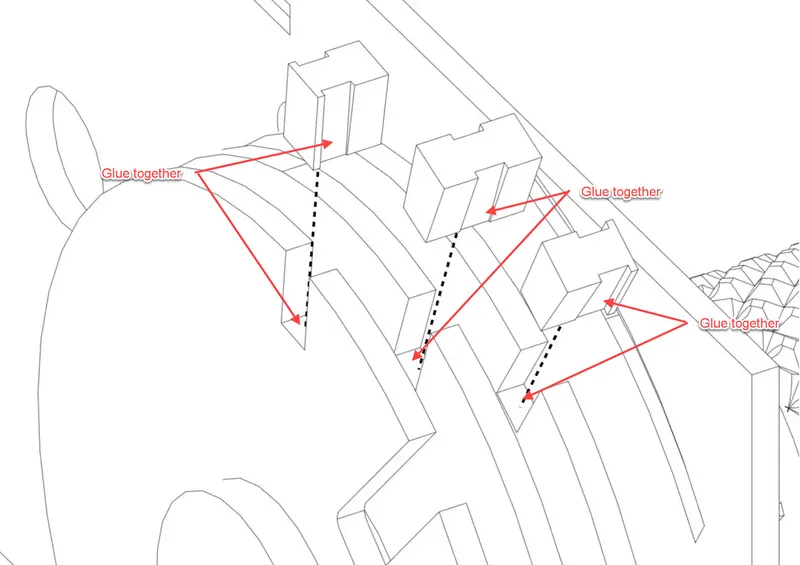
- Glue the pins to each disk. On disk_1 and disk_3 the longer part should be facing towards the centre, and the centre pin is the biggest :
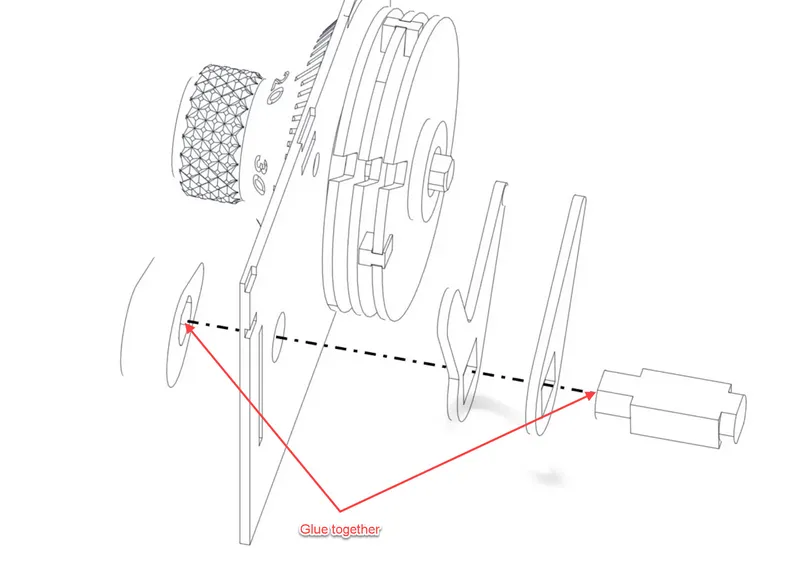
- Glue the knob to the axle_2 through the front plate, and then place the lever on the axle :
- Close the door assembly by gluing the back_plate to the front_plate :
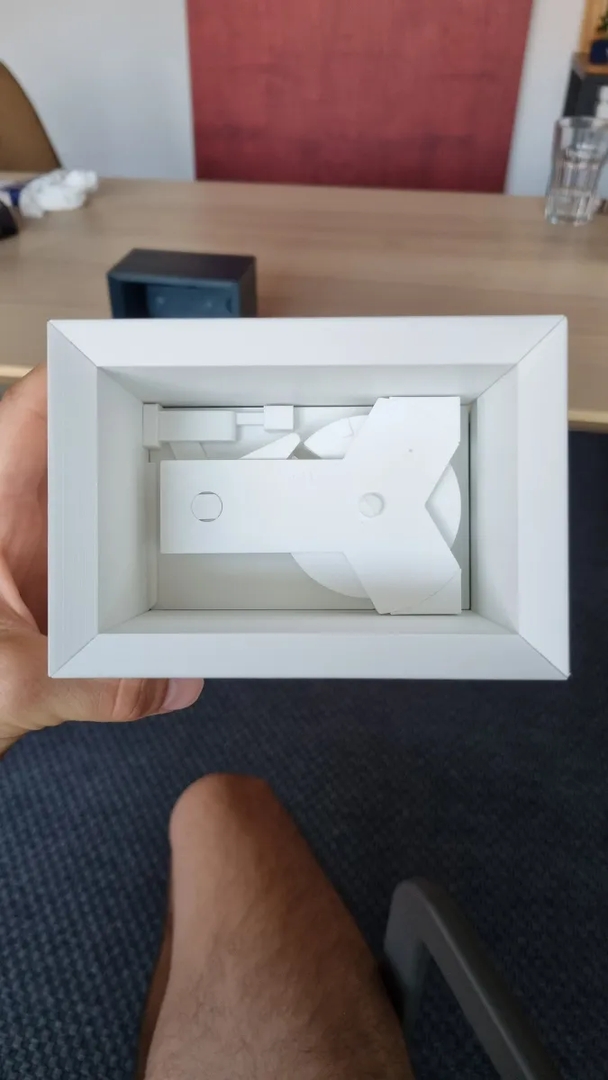
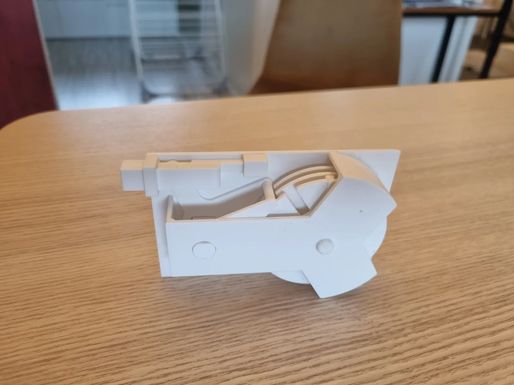
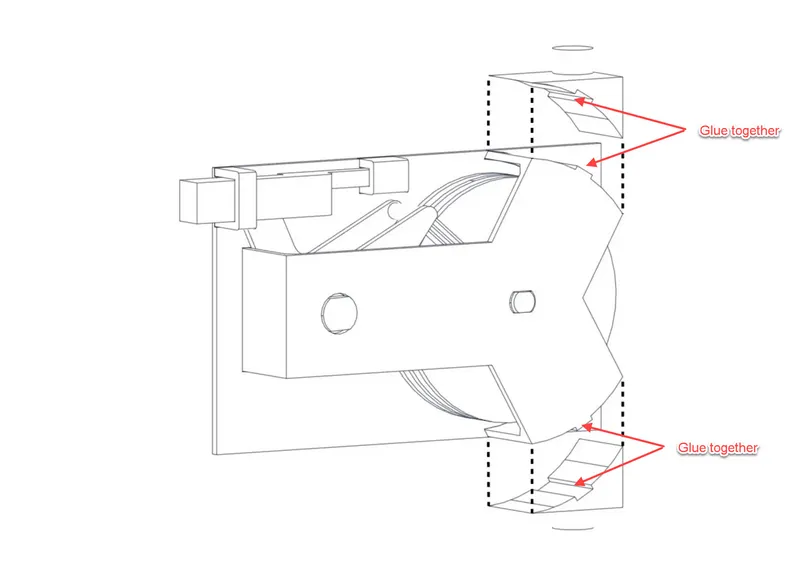
- Place the latch over the lever's arm and secure it by gluing the 2 latch guides in their dedicated spot :
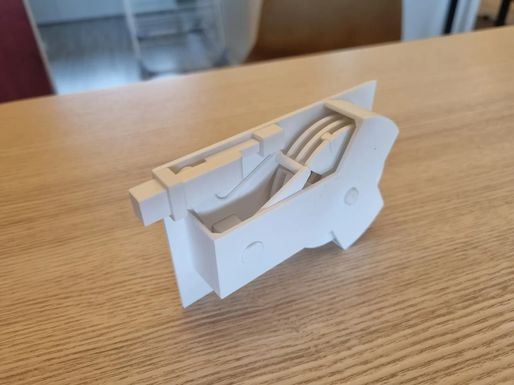
After this step, the assembly should look like this :
At this point you can figure out the combination by following these steps :
- Turn the dial on the lock clockwise three times. This connects the 3 disks together, so they now turn with the dial.
- Continue to turn the dial clockwise until the notch on the disk_3 is lined up with the lever. Stop and look at the dial to write down the first number of the combination.
- Turn the dial counterclockwise for 1 full turn past the first number to engage the middle disk.
- Continue to turn the dial counterclockwise until the notch from the middle disk lines up with the lever and stop to write down the second number of the combination.
- Finally, turn the dial clockwise until the notch from the first disk lines up with the lever. All 3 notches should now be aligned. Write down the third number of the combination. You should now be able to turn the knob and unlock the mechanism.
- Test your combination by unlocking the mechanism without looking at the disks. You can follow these instructions if you don't know how to : https://www.google.com/amp/s/www.wikihow.com/Open-a-Combination-Lock%3famp=1
- Keep the numbers of the combination somewhere as it will never change.
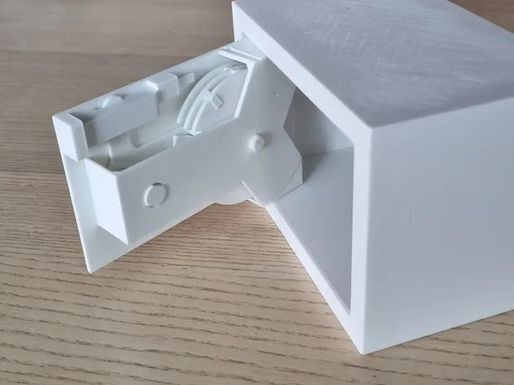
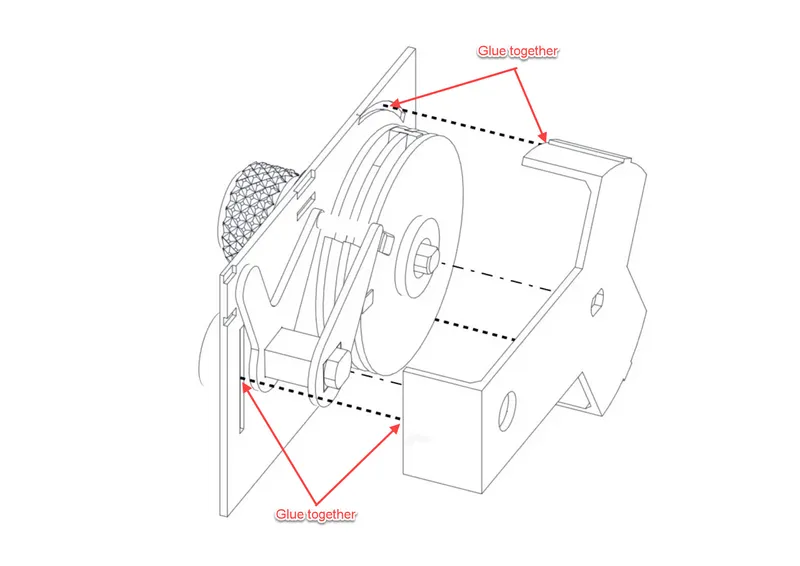
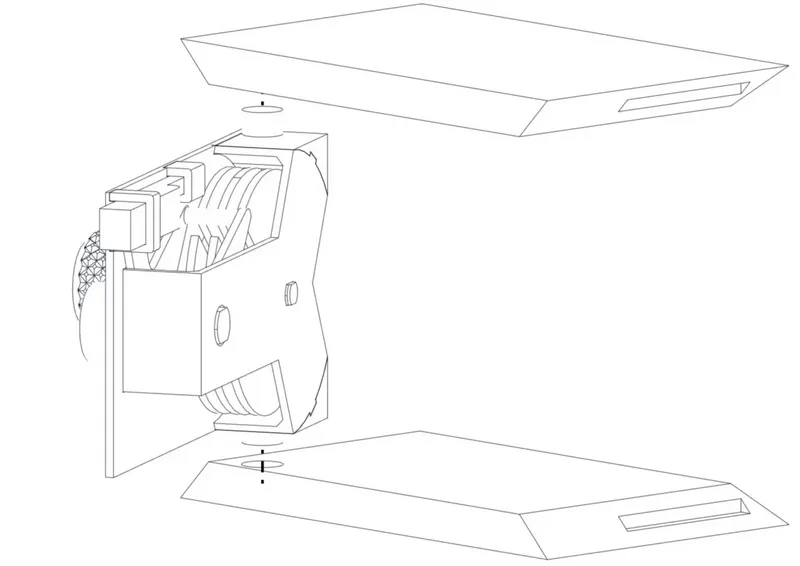
- Glue the 2 pivots to the door assembly :
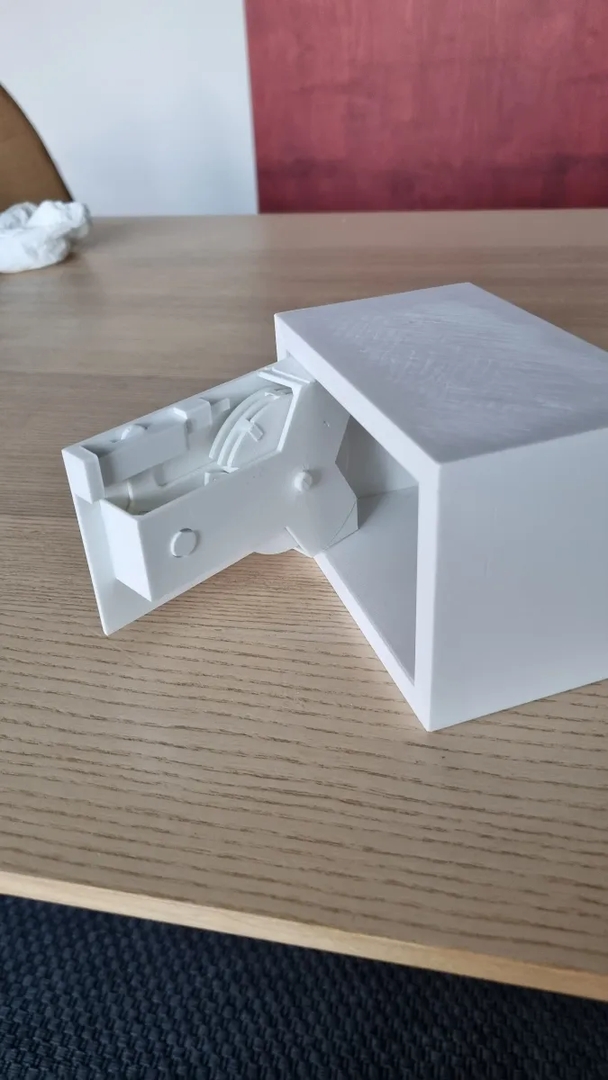
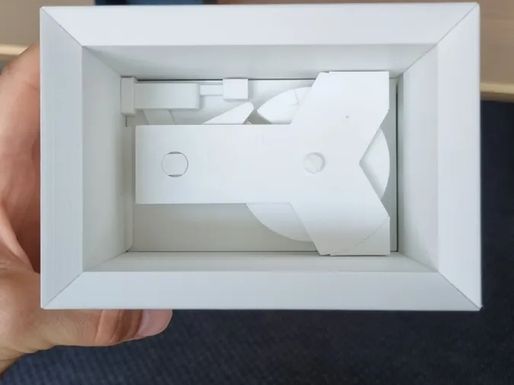
- To assemble the box start by placing the top and bottom walls on the pivots (no glue) :
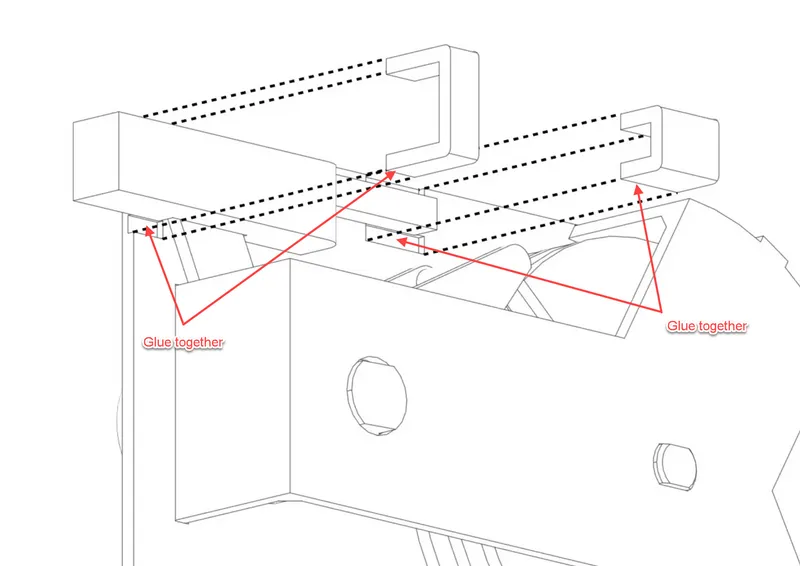
- Glue the 2 side walls :
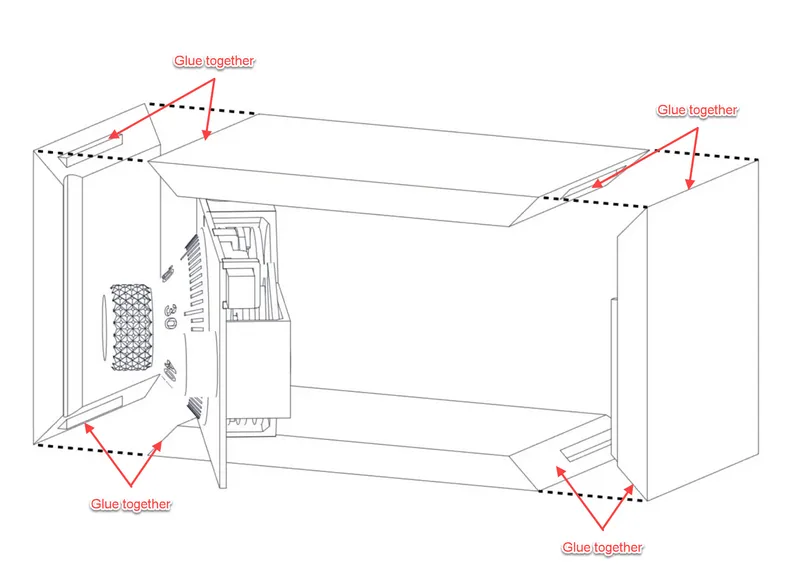
When gluing the sides, do it with the door closed so you can see that everything is well centered.
At this point you should test to lock and unlock the door a couple of times to test the combination before gluing the back_wall.
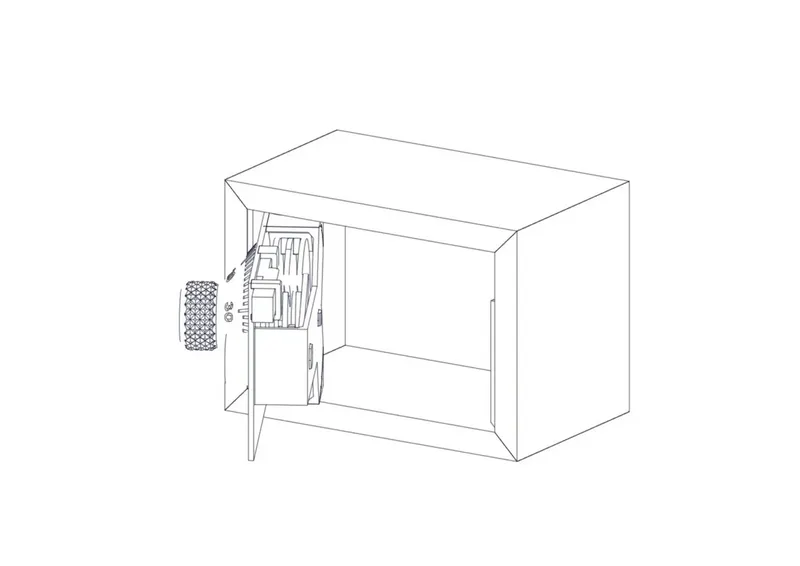
- When you are sure of the combination you can glue the back_wall to finish the safe :
License
❌ Sharing without ATTRIBUTION
✔️ Remix Culture allowed
❌ Commercial Use
❌ Free Cultural Works
❌ Meets Open Definition
This work is licensed under a Creative Commons (4.0 International License) Attribution—Noncommercial—Share Alike
https://creativecommons.org/licenses/by-nc-sa/4.0/
Details parameters
<p>Start by printing all the parts I provide, I used PLA with 0.2mm layer height and 20% infill for everything and non support.</p><p>For some part the printing orientation is quite important for the strength, so this is the orientation for the parts you may have a doubt with :</p><p>Both axle are printed on the side for better strength :</p><figure class="image image_resized image-style-align-center" style="width:350.212px;"><img style="aspect-ratio:800/529;" src="https://media.printables.com/media/prints/259699/rich_content/f7ebaab5-3779-4816-b24e-0761283d6b60/thumbs/cover/800x529/jpg/2022-08-16_18-51-13.webp" width="800" height="529"></figure><figure class="image image_resized image-style-align-center" style="width:344.075px;"><img style="aspect-ratio:800/529;" src="https://media.printables.com/media/prints/259699/rich_content/0acb844c-4234-4908-ac94-06cf01f62f36/thumbs/cover/800x529/jpg/2022-08-16_18-53-22.webp" width="800" height="529"></figure><p>The lever is printed like this :</p><figure class="image image_resized image-style-align-center" style="width:357px;"><img style="aspect-ratio:800/529;" src="https://media.printables.com/media/prints/259699/rich_content/87e2530e-0c98-41d6-9e2f-c99b297815f3/thumbs/cover/800x529/jpg/2022-08-16_18-56-02.webp" width="800" height="529"></figure><p>Both pivots are printed on the side :</p><figure class="image image_resized image-style-align-center" style="width:357px;"><img style="aspect-ratio:800/529;" src="https://media.printables.com/media/prints/259699/rich_content/af92bd15-eb56-4751-ae1a-d29cd3c9ec1e/thumbs/cover/800x529/jpg/2022-08-16_18-57-19.webp" width="800" height="529"></figure><p>The pins are printed like this :</p><figure class="image image_resized image-style-align-center" style="width:357px;"><img style="aspect-ratio:800/529;" src="https://media.printables.com/media/prints/259699/rich_content/a9e05775-2c7f-45f5-94c6-ebcbfcd46294/thumbs/cover/800x529/jpg/2022-08-16_18-56-44.webp" width="800" height="529"></figure><p>The latch is printed like this :</p><figure class="image image_resized image-style-align-center" style="width:357px;"><img style="aspect-ratio:800/529;" src="https://media.printables.com/media/prints/259699/rich_content/53cab067-bfeb-46d0-aca3-6301531ab338/thumbs/cover/800x529/jpg/2022-08-16_18-55-33.webp" width="800" height="529"></figure><p>All the oher parts orientations should be pretty obvious.</p><h4><strong>Building instructions :</strong></h4><ol><li>Glue the dial with the disk_1 through the front_plate :<br><img src="https://media.printables.com/media/prints/259699/rich_content/0723d92d-261f-45e5-b12c-153ab51f3979/thumbs/cover/800x566/png/image.webp" width="800" height="566"></li><li>Add the axle_1, the 2 remaining disks and the spacers, no glue required :<br><img src="https://media.printables.com/media/prints/259699/rich_content/797608cf-4040-4c70-9f4d-5538a6e83ec0/thumbs/cover/800x566/png/image.webp" width="800" height="566"></li><li>Glue the pins to each disk. On disk_1 and disk_3 the longer part should be facing towards the centre, and the centre pin is the biggest :<br><br><img src="https://media.printables.com/media/prints/259699/rich_content/47d5b599-6240-43c0-a7b0-2515025889af/thumbs/cover/800x565/png/2022-08-16_14-12-54.webp" width="800" height="565"><br> </li><li>Glue the knob to the axle_2 through the front plate, and then place the lever on the axle :<br><br><img src="https://media.printables.com/media/prints/259699/rich_content/9aff2047-1051-446e-99f5-4188f84e0e0b/thumbs/cover/800x566/png/image.webp" width="800" height="566"></li><li>Close the door assembly by gluing the back_plate to the front_plate :<br><img src="https://media.printables.com/media/prints/259699/rich_content/1d779e60-ca9b-4e43-af04-3f9f2c646d97/thumbs/cover/800x566/png/image.webp" width="800" height="566"></li><li>Place the latch over the lever's arm and secure it by gluing the 2 latch guides in their dedicated spot :<br><img src="https://media.printables.com/media/prints/259699/rich_content/d74cca01-1c07-4f3e-b87c-c06a4abaa67f/thumbs/cover/800x566/png/image.webp" width="800" height="566"><br><br>After this step, the assembly should look like this :<br><br><img class="image_resized" style="aspect-ratio:800/600;width:505.5px;" src="https://media.printables.com/media/prints/259699/rich_content/bfb73901-7871-4b09-b254-c44da65f9763/thumbs/cover/800x600/png/image.webp" width="800" height="600"><br><br>At this point you can figure out the combination by following these steps :<br><br> <ol><li>Turn the dial on the lock clockwise three times. This connects the 3 disks together, so they now turn with the dial.</li><li>Continue to turn the dial clockwise until the notch on the disk_3 is lined up with the lever. Stop and look at the dial to write down the first number of the combination.</li><li>Turn the dial counterclockwise for 1 full turn past the first number to engage the middle disk.</li><li>Continue to turn the dial counterclockwise until the notch from the middle disk lines up with the lever and stop to write down the second number of the combination.</li><li>Finally, turn the dial clockwise until the notch from the first disk lines up with the lever. All 3 notches should now be aligned. Write down the third number of the combination. You should now be able to turn the knob and unlock the mechanism.</li><li>Test your combination by unlocking the mechanism without looking at the disks. You can follow these instructions if you don't know how to : https://www.google.com/amp/s/www.wikihow.com/Open-a-Combination-Lock%3famp=1</li><li>Keep the numbers of the combination somewhere as it will never change.<br> </li></ol></li><li>Glue the 2 pivots to the door assembly :<br><img src="https://media.printables.com/media/prints/259699/rich_content/d0270b95-7016-42cd-ba74-dddd79de33e1/thumbs/cover/800x565/png/2022-08-16_14-12-30.webp" width="800" height="565"></li><li>To assemble the box start by placing the top and bottom walls on the pivots (no glue) :<br><br><img src="https://media.printables.com/media/prints/259699/rich_content/9c0ac323-fa50-416f-86b3-07e1119ff09a/thumbs/cover/800x566/png/image.webp" width="800" height="566"><br> </li><li>Glue the 2 side walls :<br><img src="https://media.printables.com/media/prints/259699/rich_content/e31fdf45-be45-4ee5-bdee-c3633eb2795f/thumbs/cover/800x566/png/2022-08-16_14-13-29.webp" width="800" height="566"><br>When gluing the sides, do it with the door closed so you can see that everything is well centered.<br><br>At this point you should test to lock and unlock the door a couple of times to test the combination before gluing the back_wall.<br> </li><li>When you are sure of the combination you can glue the back_wall to finish the safe :<br><img src="https://media.printables.com/media/prints/259699/rich_content/80269c6d-be09-4124-99ce-bbca537ab4ff/thumbs/cover/800x566/png/image.webp" width="800" height="566"></li></ol><p> </p>
Other information
| Created on | June 1, 2024, 11:24 a.m. |
|---|---|
| Last edition | March 9, 2026, 3:19 p.m. |
| Added by | @Hugo |
| Category | Gadgets |
| License dates | Yes |
| Product status | Active |
| Downloads | 1083 |
|---|---|
| Rating | 0.0 |
| Number of likes | 8 |
Customer reviews
0.0 out of 58 global ratingsReview this product
Share your thoughts with other customers.
Reviews (0)
No one has added a comment yet
No one has commented on this product yet. If you downloaded this product or like what you see, please rate it. Comments are very useful for other users. Build a community with our website today!