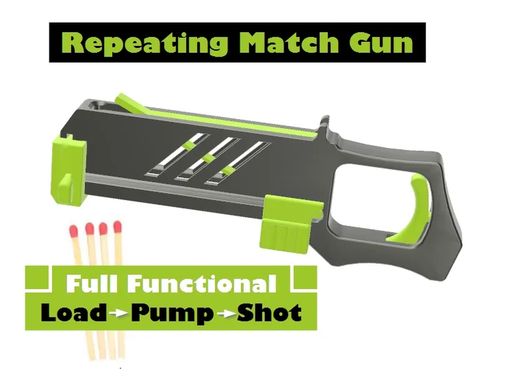
Repeating Matchstick Gun
2294
25
BamBam_Design
@BamBam_Design
| Designs: | 49 |
| Downloads: | 59463 |
| Followers: | 13 |
| About me: | Construct | Design | Print | Optimize Iam focused on designing practical things and functional toys. If you like my work, you can support me through https://www.patreon.com/BamBamDesign. Beside that you get the commercial license there😉 Happy Printing 🤗 |
Product description
- A like and/or follow costs nothing, just like the 3D model! Thank you 🤗
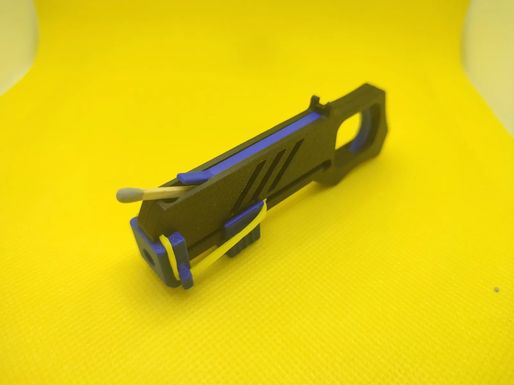
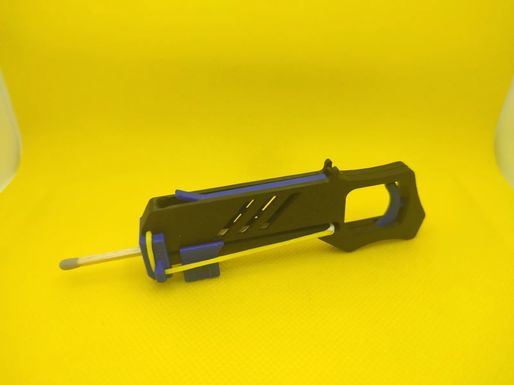
Repeating Matchstick Gun
Full printable functional Toy.
It shoots 4 matches quick in a row with Pump action to reload.
You need just a rubber band and a piece of tape.
If you have no matchstick around, i added a printable ammunition.😃
It shots awesome with good rubber band!
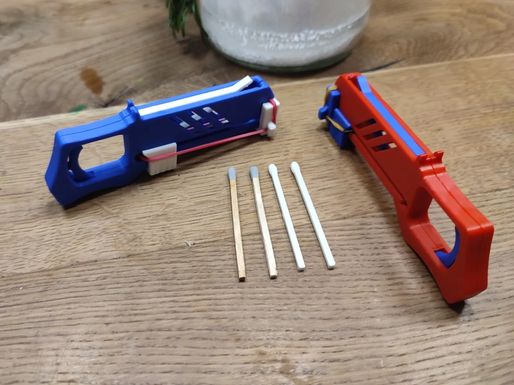
In the video i used a little cut from Thera Band Gold with a shrink tube.
Printing settings
Printed all parts in PLA+, other materials should work as well.
There are small pieces! Clean build plate and add some glue-stick!
Layer height 0,2 works well
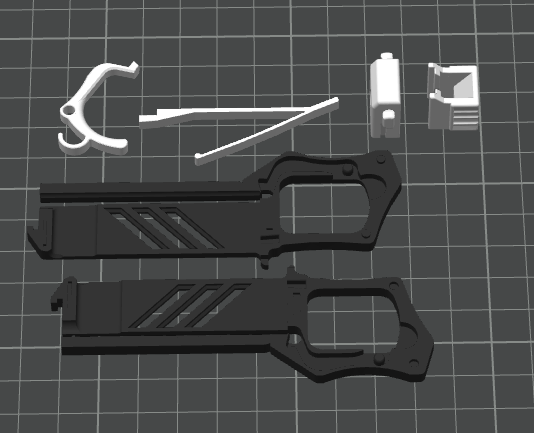
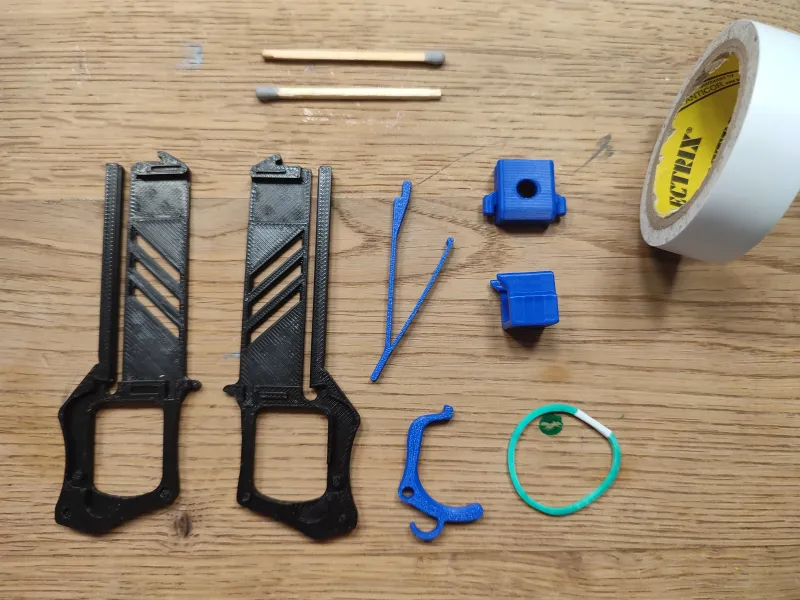
Assembly:
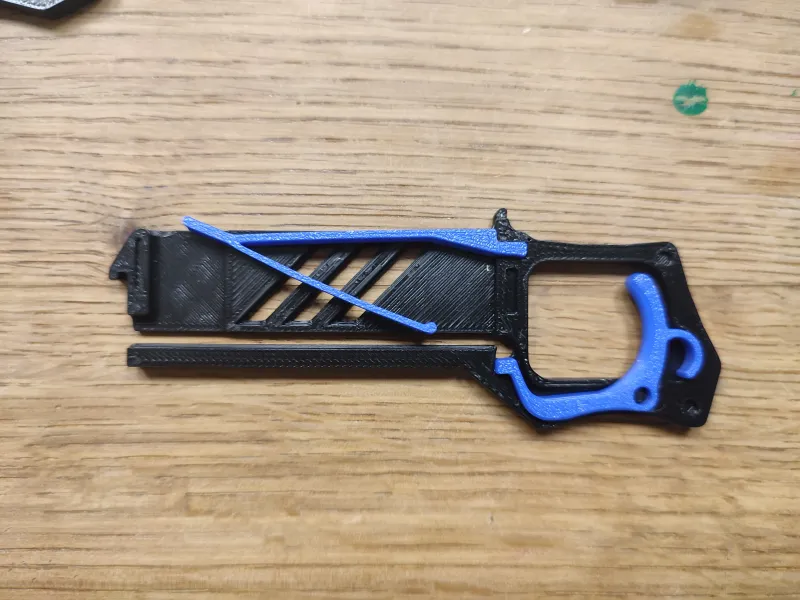
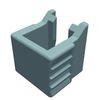
All needed parts
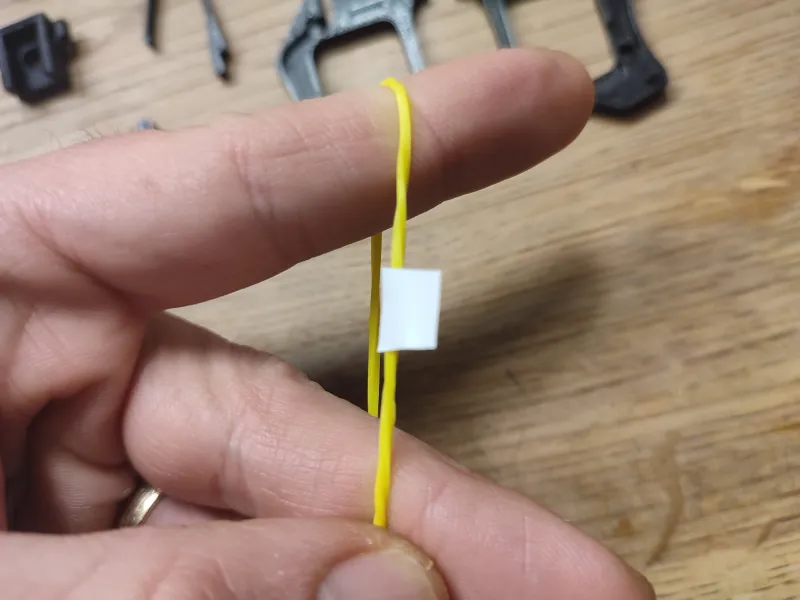
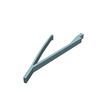
Important because of friction! Cut a piece of tape and roll one rotation around the rubber. You can use shrink tubing if you try with open loops and knot the rubber later.
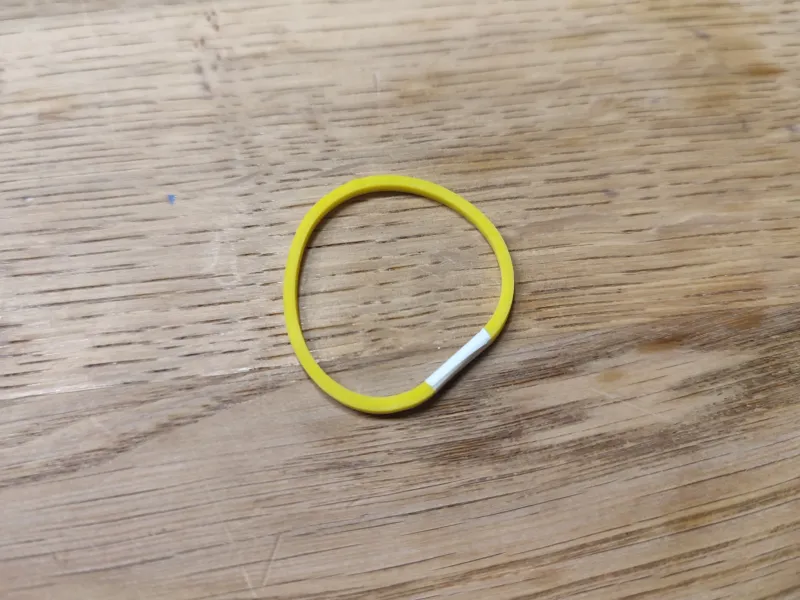
Ready…Rubber Band with tape
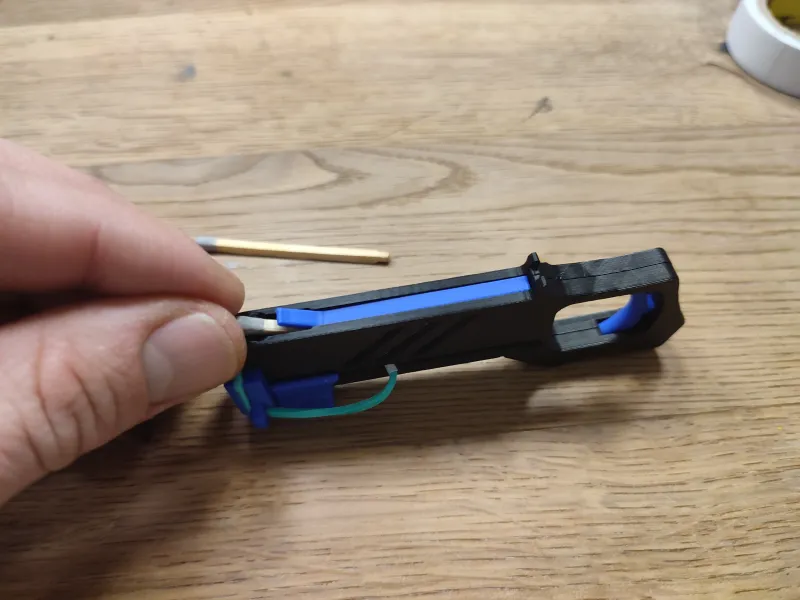
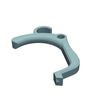
Insert the trigger and the spring in a half body
Put the other side of the body on top
Slide the rubber band and the repertoire lever in.
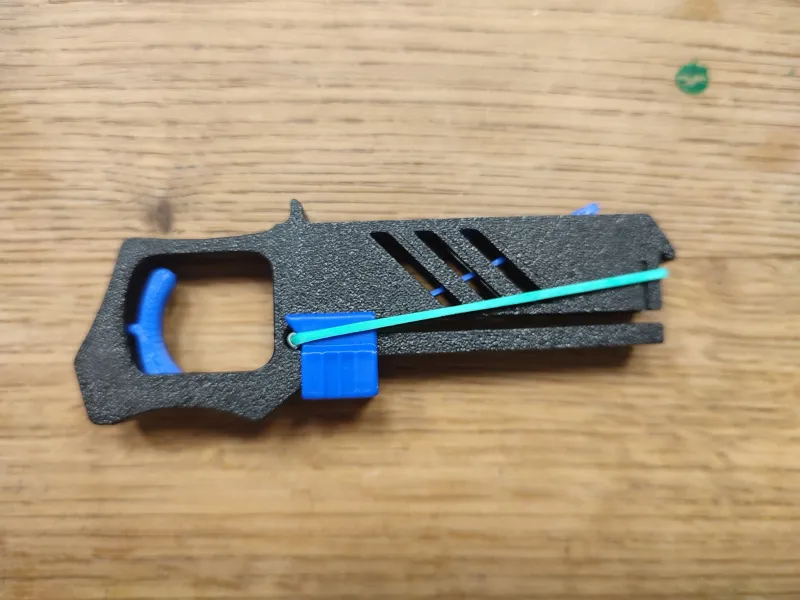
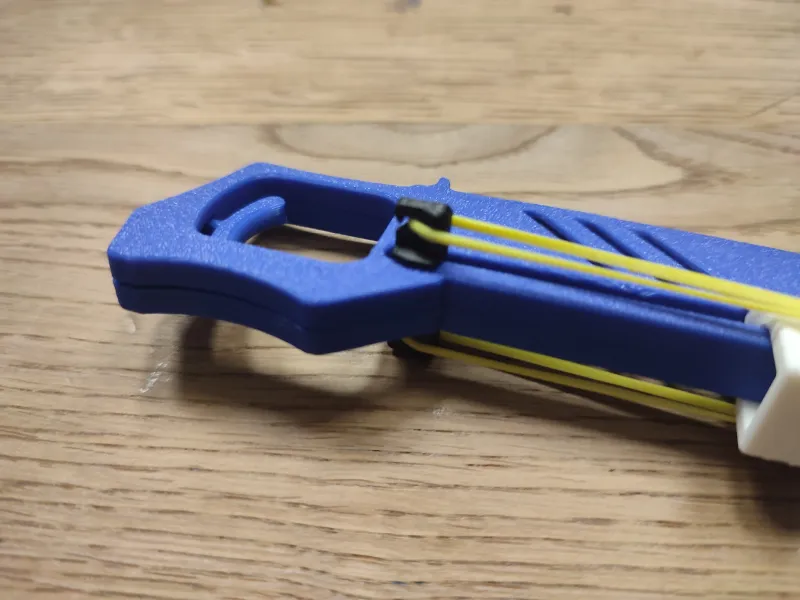
Straddle the thin piece from the body to push over the front cap. The front cap clamps the rubber as well!
Slide the front cap into the grooves and adjust the rubber. You can wrap around several times if needed.
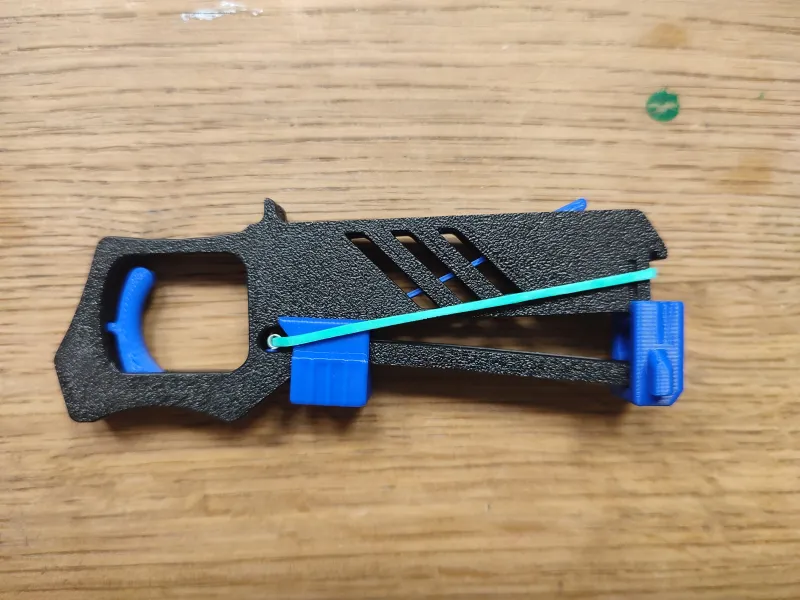
Load the sticks as shown..ready
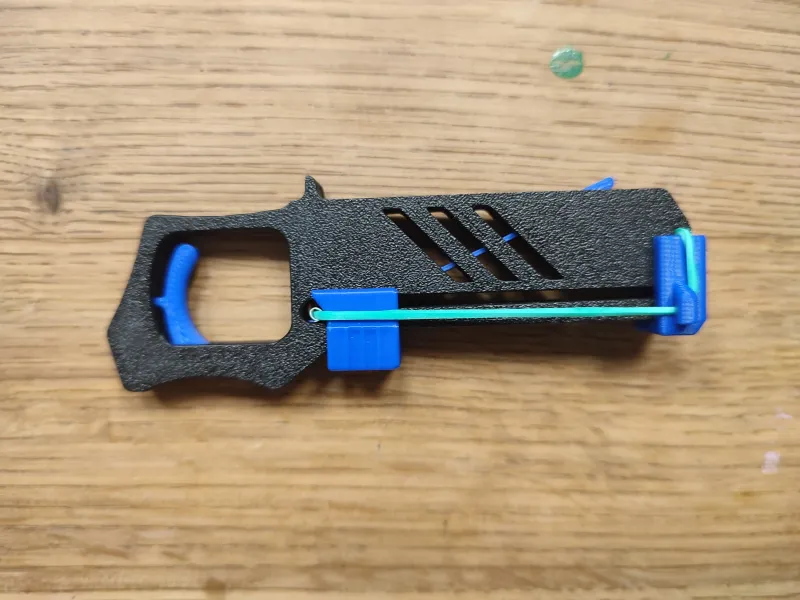
You can use the really good additional Hammer for Matchstick Gun from andre.bar as well! https://makerworld.com/models/115826
=> It's easier to install the rubber-band and it shots awesome!
Dont shot on human or animals it could hurt!
Happy printing!😃👍
License
PERSONAL USE ONLY. You are authorized to:
✔️Print and use the 3D prints of the 3D model for private use, in unlimited quantity;
✔️Share the images of your 3D prints of the 3D model on communication media such as social networks or websites.
What is not allowed:
❌No commercial use or public sharing of the 3D model;
❌No modification or adaptation of the 3D model for public sharing or sale;
❌No distribution, sale, donation or exchange of the digital files of the 3D model.
All files (7)
Details parameters
<p>Printed all parts in PLA+, other materials should work as well.</p><p>There are small pieces! Clean build plate and add some glue-stick!</p><p>Layer height 0,2 works well</p><p> </p><figure class="image image_resized" style="width:357px;"><img style="aspect-ratio:534/433;" src="https://media.printables.com/media/prints/788789/rich_content/a3501be2-7036-47b6-ac5b-57fedb19028a/2024-03-02-10_08_34-repeating-match-gun_multicolor.png" width="534" height="433"></figure><p><strong>Assembly:</strong></p><p>All needed parts</p><figure class="image image-style-align-center image_resized" style="width:357px;"><img style="aspect-ratio:800/600;" src="https://media.printables.com/media/prints/788789/rich_content/dea92790-bef6-445e-b75a-7ec954dc9a72/thumbs/cover/800x600/webp/2023-12-10_5537aaba6926e.webp" width="800" height="600"></figure><p>Important because of friction! Cut a piece of tape and roll one rotation around the rubber. You can use shrink tubing if you try with open loops and knot the rubber later.</p><figure class="image image_resized" style="width:357px;"><img style="aspect-ratio:800/600;" src="https://media.printables.com/media/prints/788789/rich_content/7b28b35c-91fa-4f7e-9925-609f8edd5ca9/thumbs/cover/800x600/webp/2.webp" width="800" height="600"></figure><p>Ready…Rubber Band with tape</p><figure class="image image_resized" style="width:357px;"><img style="aspect-ratio:800/600;" src="https://media.printables.com/media/prints/788789/rich_content/10463d60-30bd-4f7d-afbe-8f115ba61e74/thumbs/cover/800x600/webp/3.webp" width="800" height="600"></figure><p>Insert the trigger and the spring in a half body</p><figure class="image image_resized" style="width:357px;"><img style="aspect-ratio:800/600;" src="https://media.printables.com/media/prints/788789/rich_content/5268e320-8121-469e-84e3-ecf5bb61e0f7/thumbs/cover/800x600/webp/4.webp" width="800" height="600"></figure><p>Put the other side of the body on top</p><figure class="image image_resized" style="width:357px;"><img style="aspect-ratio:800/600;" src="https://media.printables.com/media/prints/788789/rich_content/778290c7-f50d-4611-b5e8-91a807e00a8f/thumbs/cover/800x600/webp/5.webp" width="800" height="600"></figure><p>Slide the rubber band and the repertoire lever in.</p><figure class="image image_resized" style="width:357px;"><img style="aspect-ratio:800/600;" src="https://media.printables.com/media/prints/788789/rich_content/162b9b5f-27c0-404e-aa1b-884c57191a89/thumbs/cover/800x600/webp/6.webp" width="800" height="600"></figure><p>Straddle the thin piece from the body to push over the front cap. The front cap clamps the rubber as well!</p><figure class="image image_resized" style="width:357px;"><img style="aspect-ratio:800/600;" src="https://media.printables.com/media/prints/788789/rich_content/49b6f8be-1437-4e47-b29b-8044867354e3/thumbs/cover/800x600/webp/7.webp" width="800" height="600"></figure><p>Slide the front cap into the grooves and adjust the rubber. You can wrap around several times if needed.</p><figure class="image image_resized" style="width:357px;"><img style="aspect-ratio:800/600;" src="https://media.printables.com/media/prints/788789/rich_content/411a2a7d-b760-4b98-ac56-810a9330a804/thumbs/cover/800x600/webp/8.webp" width="800" height="600"></figure><p>Load the sticks as shown..ready</p><figure class="image image_resized" style="width:357px;"><img style="aspect-ratio:800/600;" src="https://media.printables.com/media/prints/788789/rich_content/0905767e-ce34-4a8b-ad02-5d0b0edc8faa/thumbs/cover/800x600/webp/9.webp" width="800" height="600"></figure><p>You can use the really good additional <strong>Hammer</strong> for Matchstick Gun <strong>from andre.bar</strong> as well! <a href="https://makerworld.com/models/115826">https://makerworld.com/models/115826</a></p><p>=> It's easier to install the rubber-band and it shots awesome!</p><figure class="image image-style-align-center image_resized" style="width:357px;"><img style="aspect-ratio:800/600;" src="https://media.printables.com/media/prints/788789/rich_content/7890bf54-3174-4105-a03b-daf6615ee481/thumbs/cover/800x600/webp/10.webp" width="800" height="600"></figure><p> </p><p>Dont shot on human or animals it could hurt!</p><p>Happy printing!😃👍</p>
Other information
| Created on | May 31, 2024, 8:16 a.m. |
|---|---|
| Last edition | March 20, 2026, 7:49 p.m. |
| Added by | @BamBam_Design |
| Category | Toys & Games |
| License dates | Yes |
| Product status | Active |
| Downloads | 2294 |
|---|---|
| Rating | 5.0 |
| Number of likes | 25 |
Customer reviews
5.0 out of 525 global ratingsReview this product
Share your thoughts with other customers.
Reviews (1)
notcloud
Jan. 5, 2025, 5:28 a.m.Verified User
Works like a charm! Looks great, is easy to print and very simple yet effective!