

Toy OTF Switchblade
11
0
11
0
Marc3DP
@Marc3DP| Designs: | 370 |
| Downloads: | 27061 |
| Followers: | 0 |
| About me: | My name is Martin, better known as Marc3DP. I'm a huge 3d printing enthusiast and a co-creator of 3D PrintShelf . I have also a Youtube channel about 3D printing models https://www.youtube.com/c/Marc3DP |
Product description
Toy OTF Switchblade by OwenTF
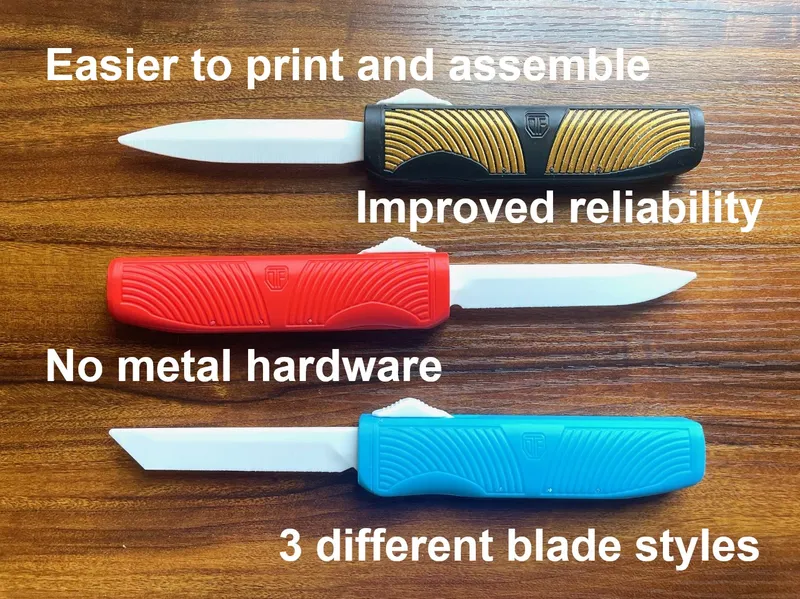
CHECK OUT THE IMPROVED VERSION HERE
Description
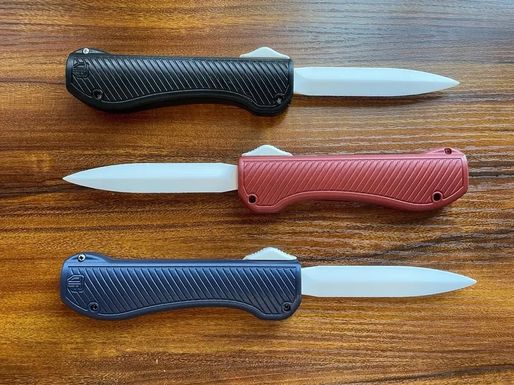
This is a toy Automatic OTF Knife I designed. What makes this design different from a typical switchblade is that it not only ejects the blade when the switch is pushed forward but retracts when the switch is pushed backwards. This means it does not need to be manual reset like a classic switchblade. It also means its very fun to play with.
You can find my other toy knife designs here.
You can obtain a commercial license to sell prints of this here. Commercial seller tier club members have permission use this model for commercial purposes during active membership.
Printing settings
Instructions
- I recommend printing with 3 wall layers and 30% infill.
- A brim is recommended if you have problems with bed adhesion.
Support Removal and Assembly
The first step after printing is removing supports. There are supports on the handles, carriage, and blade. You can use the assemble animation and photos below as a reference of what it should look like after supports have been removed.
A video showing how to assemble the design is located below.
In addition to the 3D-printed parts this design requires additional hardware. It requires 3 screws, 2 springs, and 2 to 4 rubber bands. I have included the links to the exact parts required but they come in large packs that may not be convenient if you are making only one knife. A more affordable option would be going to a hardware store and finding substituents. You can also take screws and springs from a Nerf gun.
When assembling first check that the carriage (the part with the blade inside of it) slides freely inside the handles. Then check that the blade slides freely inside the carriage. If anything does not slide smoothly sand down contact surfaces. For the design to work properly the latch springs and rubber band tension must be just right. This can be calibrated my changing the number and type of rubber bands. For the springs I have I like to use two strong rubber bands (one on each side) and two weak rubber bands (one on each side). The design also works with asymmetric rubber band arrangements. Information about hardware specifications can be found below.
Springs - https://www.mcmaster.com/catalog/129/1492/9657K614
Screws - https://www.mcmaster.com/catalog/129/3372/90385A317
Strong Rubber bands - https://www.amazon.com/dp/B093Q2M536?psc=1&ref=ppx_yo2ov_dt_b_product_details
Weak Rubber bands - https://www.amazon.com/dp/B008X0A1NA?psc=1&ref=ppx_yo2ov_dt_b_product_details

Assembly
This video shows what each part should look after the supports have been removed. It also shows how to assemble them.
Uncut video of me assembling and troubleshooting.
This is a re-upload of the model made by OwenTF ➡ https://www.printables.com/model/764868-toy-otf-switchblade-old-version . I have the creator's consent to use the photos and description.
License
❌ Sharing without ATTRIBUTION
✔️ Remix Culture allowed
❌ Commercial Use
❌ Free Cultural Works
❌ Meets Open Definition
This work is licensed under a Creative Commons (4.0 International License) Attribution—Noncommercial—Share Alike
https://creativecommons.org/licenses/by-nc-sa/4.0/
Details parameters
<h3><strong>Instructions</strong></h3><ul><li>I recommend printing with 3 wall layers and 30% infill.</li><li> A brim is recommended if you have problems with bed adhesion.</li></ul><p><strong>Support Removal and Assembly</strong></p><p>The first step after printing is removing supports. There are supports on the handles, carriage, and blade. You can use the assemble animation and photos below as a reference of what it should look like after supports have been removed.</p><p>A video showing how to assemble the design is located below.</p><p>In addition to the 3D-printed parts this design requires additional hardware. It requires 3 screws, 2 springs, and 2 to 4 rubber bands. I have included the links to the exact parts required but they come in large packs that may not be convenient if you are making only one knife. A more affordable option would be going to a hardware store and finding substituents. You can also take screws and springs from a Nerf gun.</p><p>When assembling first check that the carriage (the part with the blade inside of it) slides freely inside the handles. Then check that the blade slides freely inside the carriage. If anything does not slide smoothly sand down contact surfaces. For the design to work properly the latch springs and rubber band tension must be just right. This can be calibrated my changing the number and type of rubber bands. For the springs I have I like to use two strong rubber bands (one on each side) and two weak rubber bands (one on each side). The design also works with asymmetric rubber band arrangements. Information about hardware specifications can be found below.</p><p>Springs - <a href="https://www.mcmaster.com/catalog/129/1492/9657K614">https://www.mcmaster.com/catalog/129/1492/9657K614</a></p><p>Screws - <a href="https://www.mcmaster.com/catalog/129/3372/90385A317">https://www.mcmaster.com/catalog/129/3372/90385A317</a></p><p>Strong Rubber bands - <a href="https://www.amazon.com/dp/B093Q2M536?psc=1&ref=ppx_yo2ov_dt_b_product_details">https://www.amazon.com/dp/B093Q2M536?psc=1&ref=ppx_yo2ov_dt_b_product_details</a></p><p>Weak Rubber bands - <a href="https://www.amazon.com/dp/B008X0A1NA?psc=1&ref=ppx_yo2ov_dt_b_product_details">https://www.amazon.com/dp/B008X0A1NA?psc=1&ref=ppx_yo2ov_dt_b_product_details</a></p><p><strong><img src="https://media.printables.com/media/prints/764868/rich_content/0f8ce4c7-b240-4cce-a6d7-28a6832062d2/thumbs/cover/800x650/jpeg/a11335ae-5bff-417f-92cc-fb7b21ed78e5.webp" width="800" height="650"></strong></p><h3> </h3><h3><strong>Assembly</strong></h3><p>This video shows what each part should look after the supports have been removed. It also shows how to assemble them.</p><figure class="media"><div data-oembed-url="https://youtu.be/K974GJML1h0"><div style="position: relative; padding-bottom: 100%; height: 0; padding-bottom: 56.2493%;"><iframe src="https://www.youtube.com/embed/K974GJML1h0" style="position: absolute; width: 100%; height: 100%; top: 0; left: 0;" frameborder="0" allow="autoplay; encrypted-media" allowfullscreen=""></iframe></div></div></figure><p> </p><p><strong>Uncut video of me assembling and troubleshooting.</strong></p><figure class="media"><div data-oembed-url="https://youtu.be/JwngdMCppik"><div style="position: relative; padding-bottom: 100%; height: 0; padding-bottom: 56.2493%;"><iframe src="https://www.youtube.com/embed/JwngdMCppik" style="position: absolute; width: 100%; height: 100%; top: 0; left: 0;" frameborder="0" allow="autoplay; encrypted-media" allowfullscreen=""></iframe></div></div></figure><p> </p><p>This is a re-upload of the model made by <a href="https://www.printables.com/@OwenTF_1791221"><strong>OwenTF</strong></a><strong> </strong> ➡ <a href="https://www.printables.com/model/764868-toy-otf-switchblade-old-version">https://www.printables.com/model/764868-toy-otf-switchblade-old-version</a> . I have the creator's consent to use the photos and description.</p>
Other information
| Created on | May 7, 2024, 9:45 a.m. |
|---|---|
| Last edition | May 18, 2024, 8:23 a.m. |
| Added by | @Marc3DP |
| Category | Toys & Games |
| License dates | Yes |
| Product status | Active |
| Downloads | 11 |
|---|---|
| Rating | 0.0 |
| Number of likes | 0 |
Customer reviews
0.0 out of 50 global ratingsReview this product
Share your thoughts with other customers.
Reviews (0)
No one has added a comment yet
No one has commented on this product yet. If you downloaded this product or like what you see, please rate it. Comments are very useful for other users. Build a community with our website today!